Instagram Reply Enhancers #
Instagram is currently one of the most popular social media platforms overall, and it continues to gain users on a daily basis, making it one of the most popular social media platforms overall. The core programme, which previously featured some amazing features, has been updated with some interesting new ones thanks to the addition of SocialNowa Chatbot.
Hide/delete Comments #
After installing the Instagram Reply Enhancers feature, you will be given the option to hide or delete offensive comments; in addition, you will be able to provide keywords that are separated by commas for the purpose of hiding or deleting comments that match with these keywords. These options will become available after you install the feature.
You can access the “Enable Auto Comment Reply” option by selecting the icon that appears under the thumbnail of the post. Now, click on the available choice.
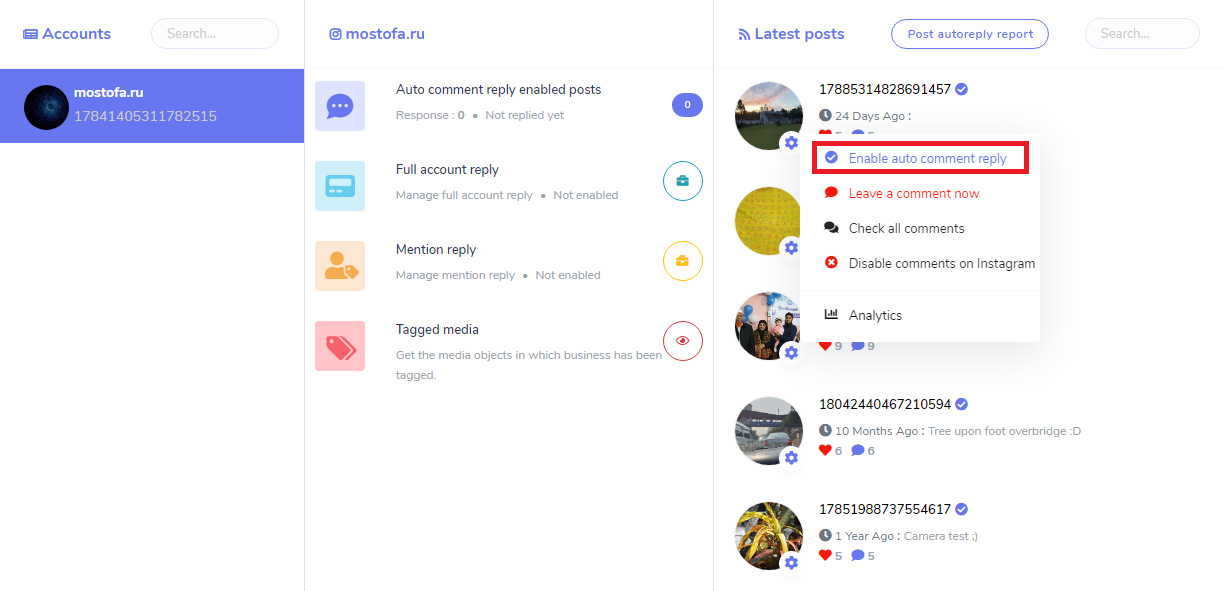
A modal for auto-replying to comments will pop up, and it will include a hide/delete option for comments that are inappropriate. You can change the settings at any time, however the “hidden” option is always selected by default. To use this option, you will need to input the keywords that correspond to the people whose posts you want to hide or delete.
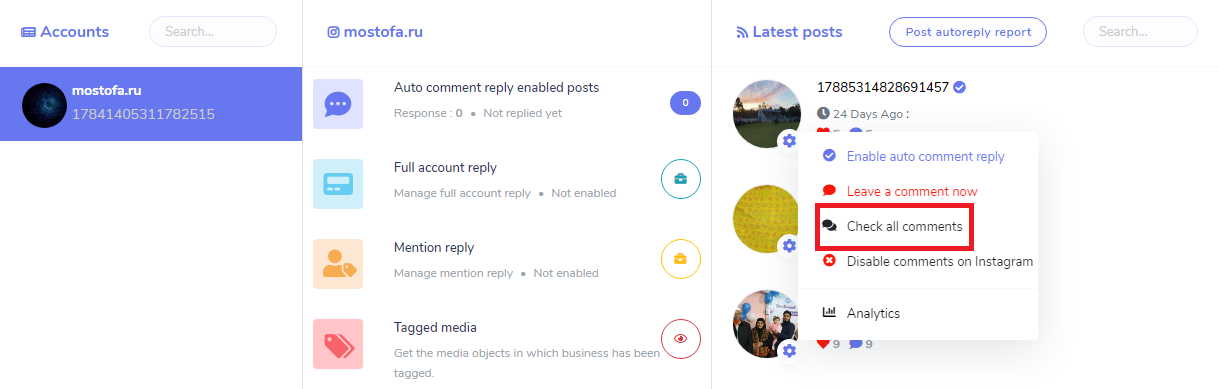
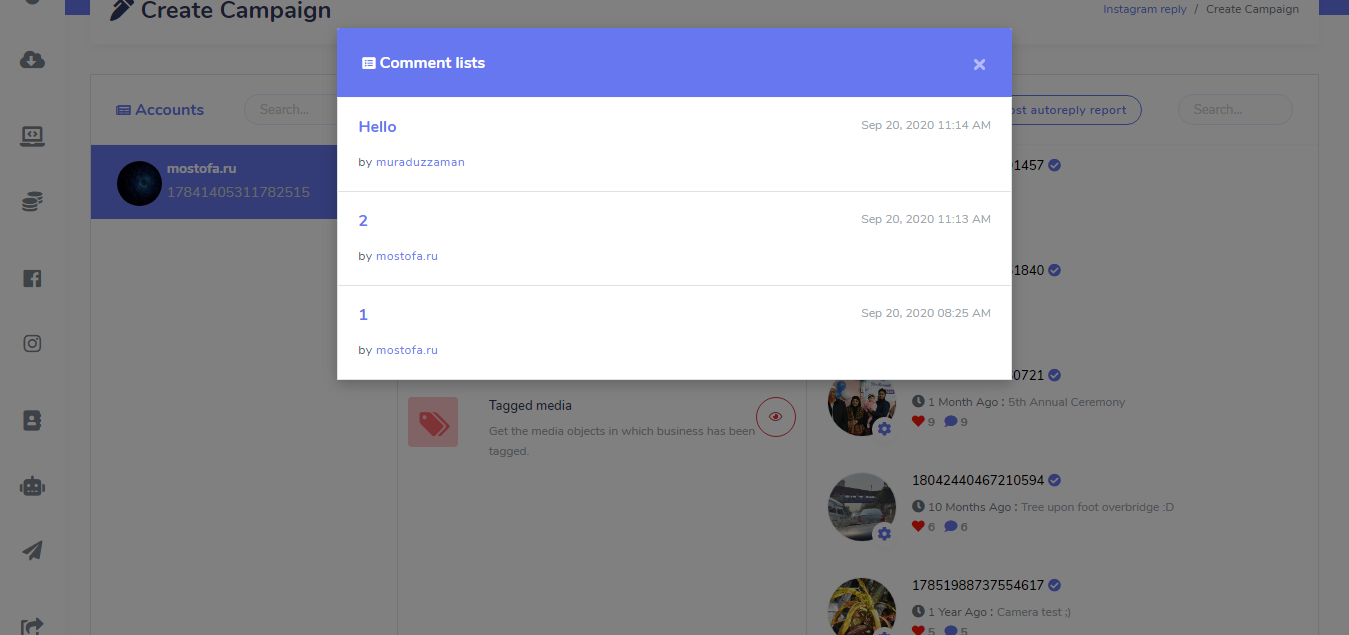
Examine All Comments #
You will also be able to see an option named “Check All Comments” in the description that was just presented to you. This option allows you to collect all of the comments that have been made on a post into a single place. When you select the option, you will be presented with all of the comments related to that post.
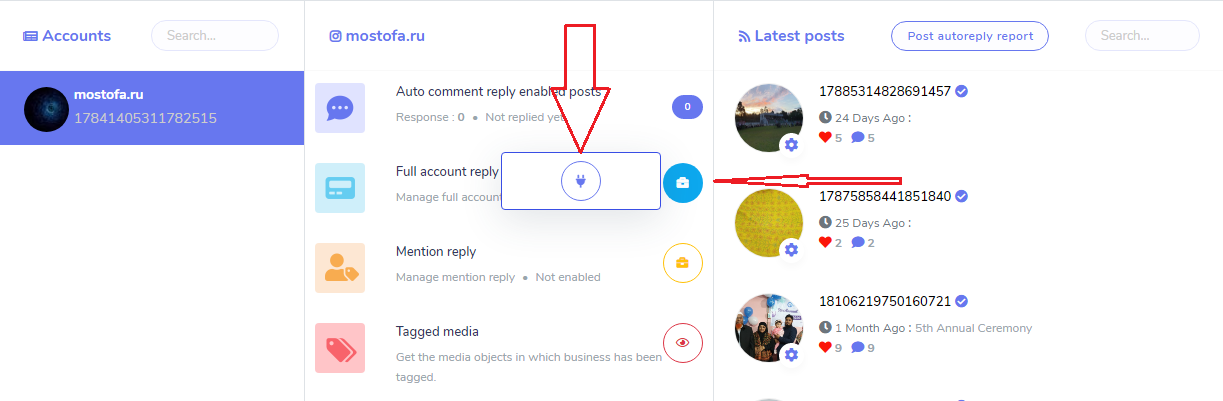
Full Account Reply Settings #
The SocialNowa Chatbot now has a Full Account Reply feature, in addition to its previous auto-reply feature for comments on individual posts. On your Instagram business account, you now have the option to enable full account reply for any and all of your posts. To activate it, all that is required of you is to fill out the form for the auto reply.
First, click the icon from the toolbar, and then select the Enable icon from the menu.
You will be given with a modal asking for full account reply information, and you will be required to submit all of the required information. When you enable Full Account Reply for your Instagram business account, the system will send replies to comments anytime a new comment is received for any of your linked Instagram business account’s posts. This occurs whenever Full Account Reply is enabled. You have the option of selecting full account reply settings to be either general or keyword filter based.
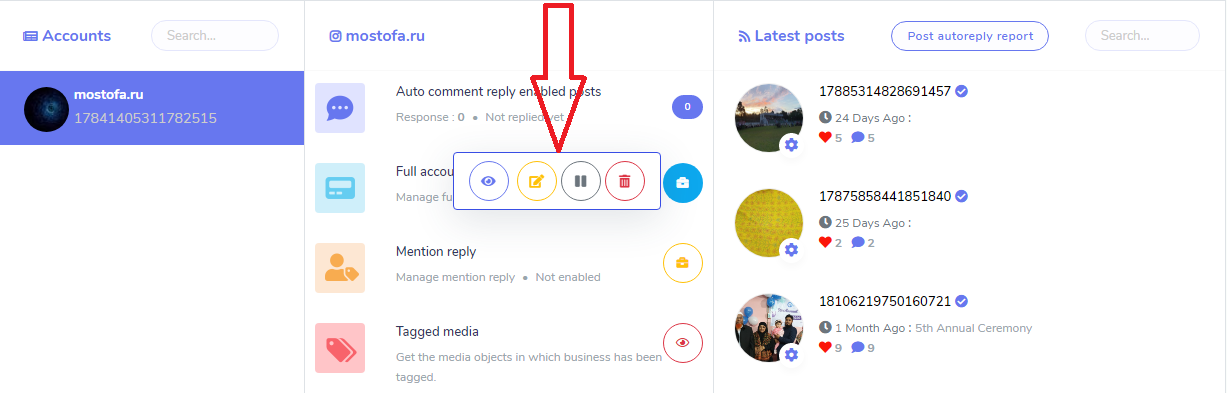
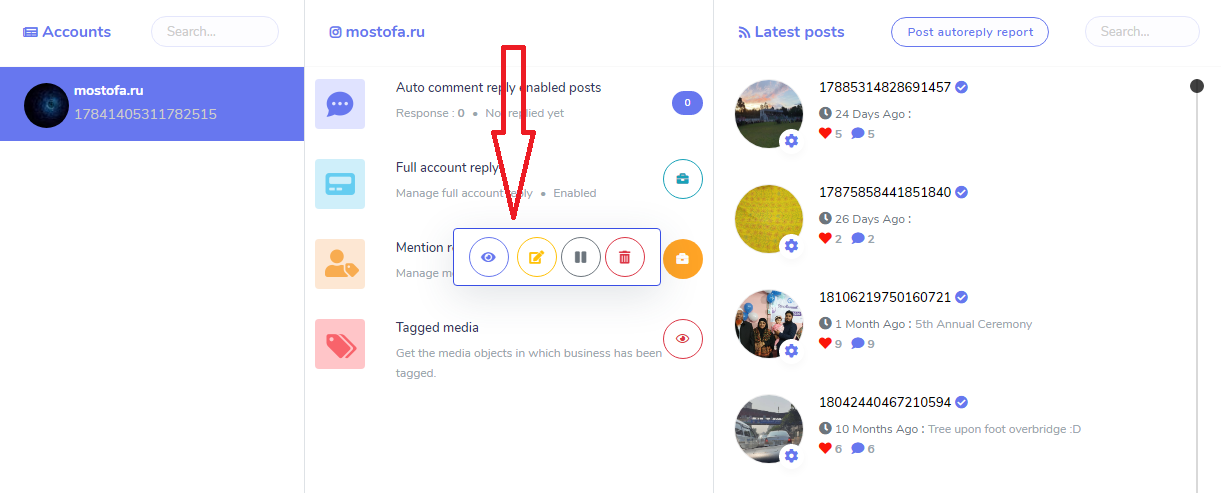
When you have finished enabling full account reply, the list of actions button for full account reply settings will become visible to you. You have the ability to view the reply settings button, as well as report it, change it, pause and play it, and remove it.
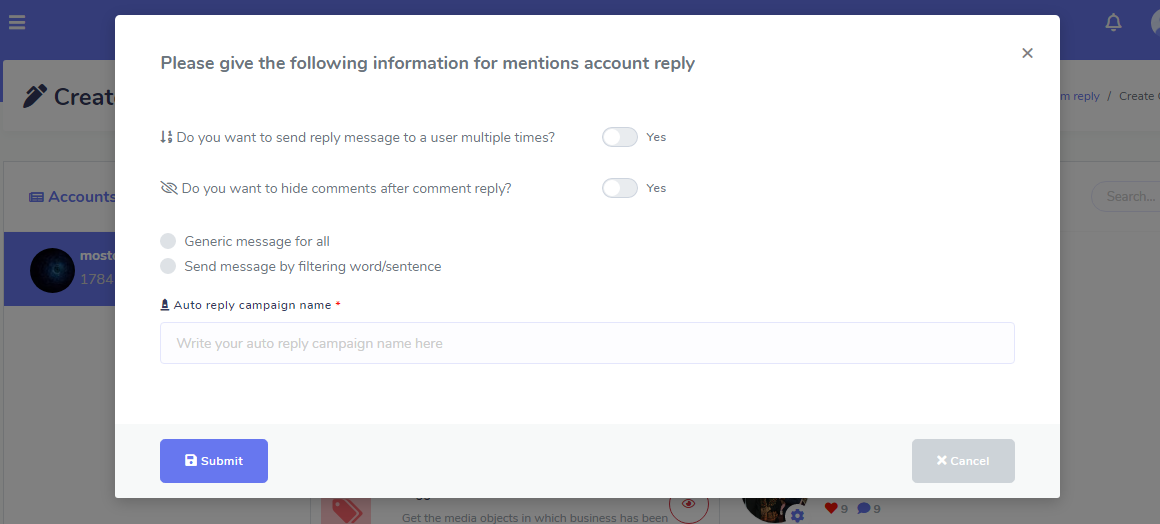
Mention Reply Settings #
You will not only be able to set a complete account reply for your Instagram business account, but you will also be able to set a mention reply. You may get the mention reply form by clicking on the icon that is located next to the phrase “full account reply,” and then clicking on the button that says “enable mention reply.”
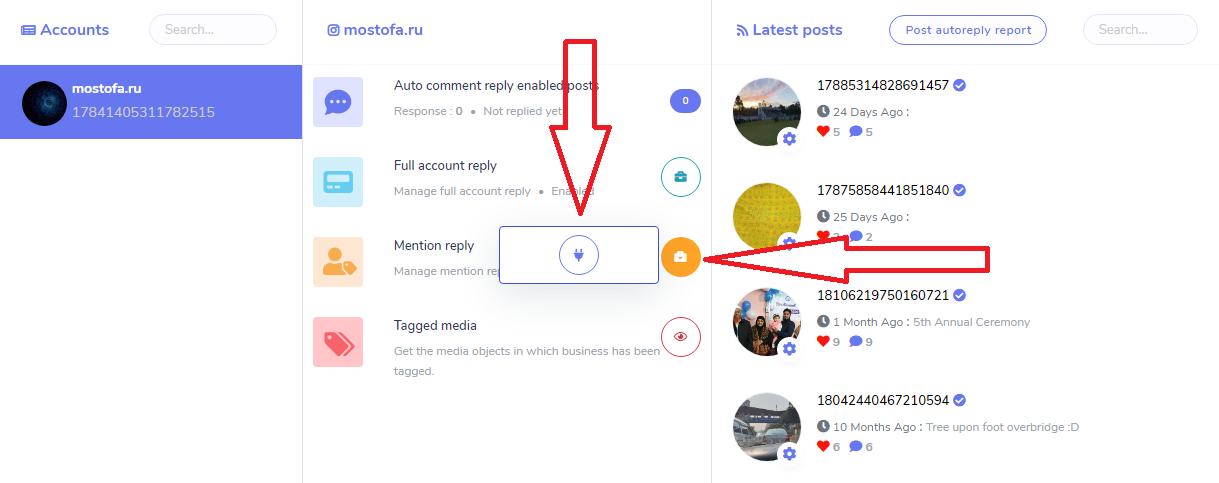
Complete the form, then click the “Submit” button when you’re done. If you enable the mention reply settings for your Instagram business account, then whenever you are mentioned in any comments or posts on your Instagram account by any user, the system will send a reply to the comments in which you were mentioned. You will be able to see the list of actions button for mentioning reply settings once you have enabled full account reply. You have the option to view the reply settings button, as well as report it, change it, pause and play it, and remove it. Identified as being media
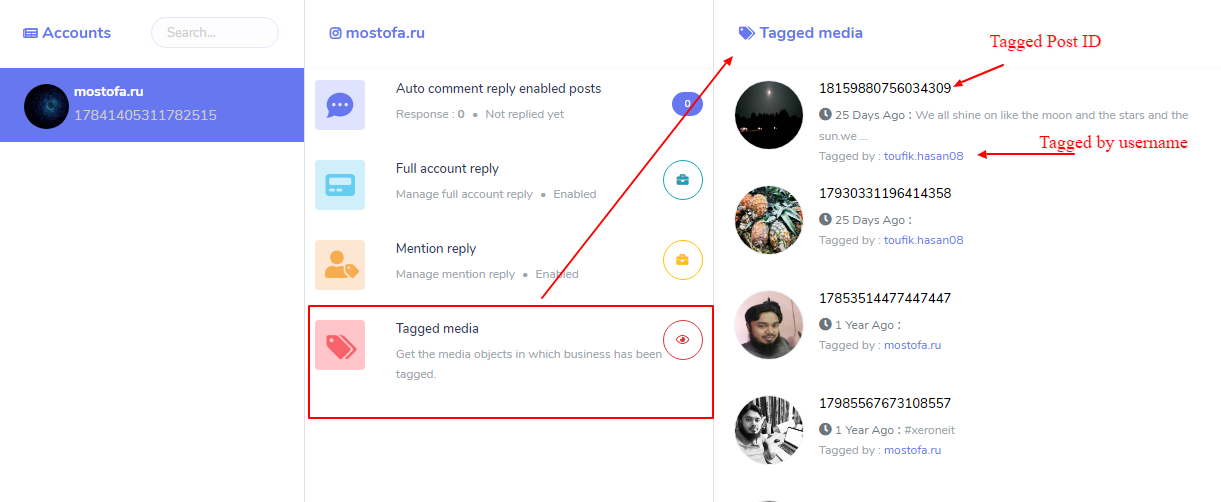
The posts in which you are tagged or mentioned by other Instagram users are what are referred to as “Tagged Media” features. To view the lists of tagged posts, either click on the Tagged Media area of the page or on the symbol.
The lists will be presented in the column located to the right. Please take a look at the picture that is below.

TAG CAMPAIGN #
Step one is to click to Comment Automation > Automation Campaign and click the “Enable & Fetch Commenter” button. This will enable tag campaigns for the posts you select from the list of recent articles. You also have the option to enable tag campaigns through the “Set Campaign by ID” menu.
After that, click to the Comment Automation > Tag Campaign menu, and there you will find all post that are tag campaign activated. You can view the number of comments and people who commented on each row. Simply clicking the “Re-scan” button will re-sync your new comments. There are a few plus and eye-sign buttons that are visible to you. The plus sign can be used to initiate the creation of a new campaign, while the eye symbol will take you to the report. The first set of buttons allows users to make comments and bulk tags, while the second set of buttons allows users to reply to comments in masse.
Auto commenting on posts and bulk tagging all of the commenters
When you leave a remark, the other commenters will be notified of it, and they will return to the post to read it. You have another opportunity to make your post go viral because it will soon begin to appear in the feeds of individuals as well as the friends of people who remark on it. To accomplish this, all that is required of you is to devise a simple campaign. You also have the option to keep a certain person from being tagged. There is the option of using multimedia responses and scheduling campaigns.
Each comment will automatically tag the person who made the comment.
A notification will be given to each commenter if you mention another commenter in a reply, which will make the reply feel more personal. Imagine that your post has received one thousand comments and that you want to respond to each one by mentioning the commenter’s name. You can accomplish this by by establishing a straightforward campaign. Simply copy and paste the content of the comment into the post. When the campaign is finished, you will be able to observe 1,000 replies as your page tags comments, as shown in the following example: You also have the option of selecting how many times you would like to respond to a single remark (if the same person commented multiple times). It is quite important to use a sufficient amount of delay in order to prevent having Facebook label your messages as spam. There is an option for a multimedia response.
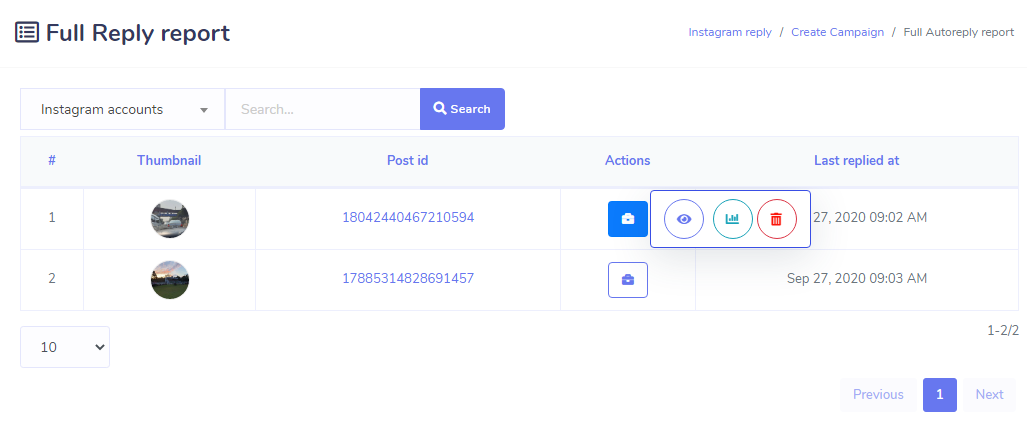
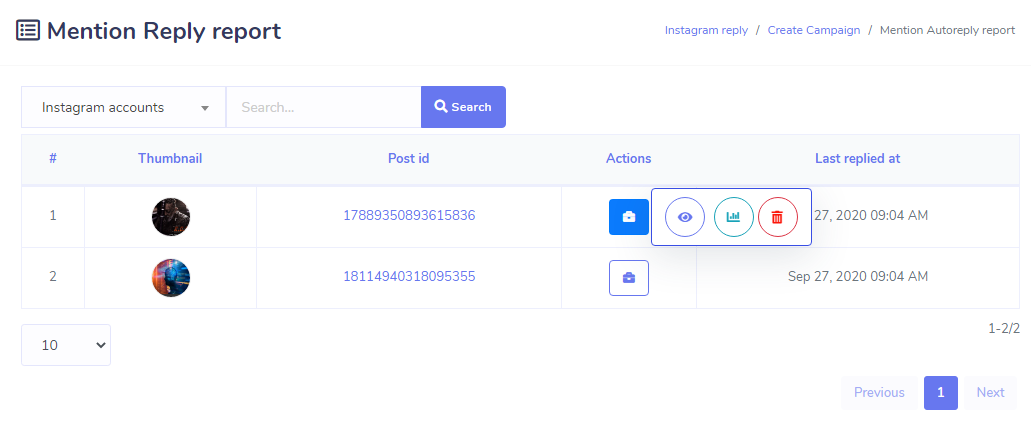
Reports #
You have the ability to view the reports in their full and to mention the reply settings from both views. If you want to view the reports for each individual account, you will need to click to the report section of the campaign build section in its full, mention the reply settings, and then click the “Report” button.

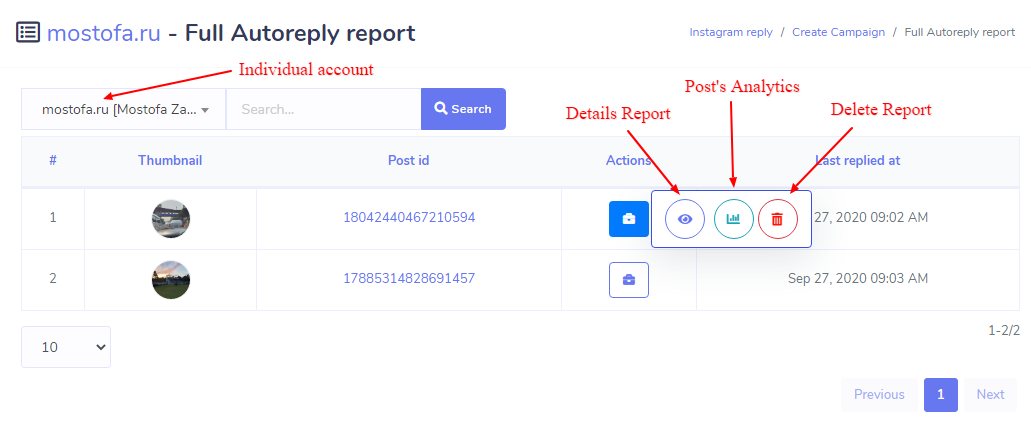
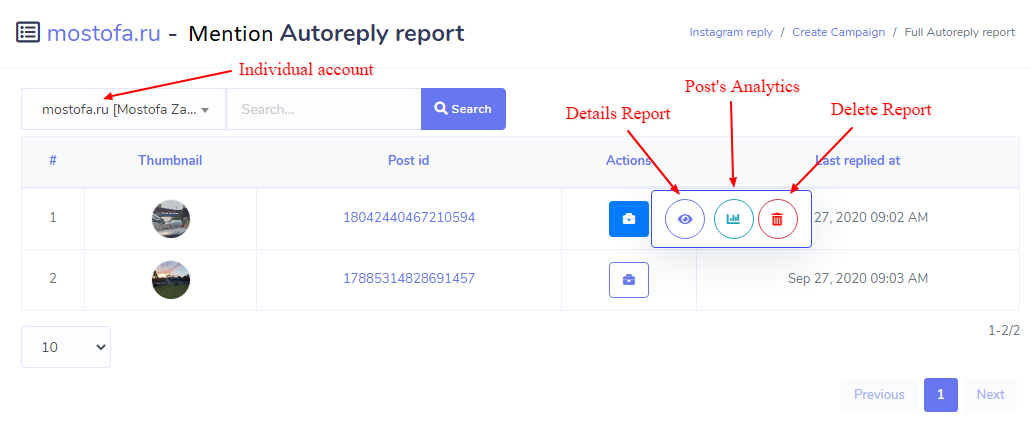
You can also visit the pages of the report to view the full mention and reply data for all of your Instagram business profiles in one one place. To see all of your account’s reports, go to Comment Automation > Reports and then select Full or Mention Reply Reports from the drop-down menu.