Key Features
Use conditional logic based on system and custom fields
Arithmetic and string operators support
Support for multiple conditions
Respond based on a single match or on all conditions matching
How to Use | Conditional Reply #
Using this condition add-on, you can build a condition and rules-based messenger bot that can talk to people intelligently. For example, if the user is male, the bot will call him Mr. On the other hand, if the user is female, the bot will call her Miss or Mrs. And if the system already has the email number of a specific user, the bot will inform the user that the system already has the email number. Contrarily, if the system doesn’t have the email number of a specific user, the bot will ask for the email number from the user.
To build a conditional and rules-based messenger bot, you have to use an element called “condition” that will work as the entry point of the conditional conversation.
Let’s see how to build a conditional and rules-based messenger bot.
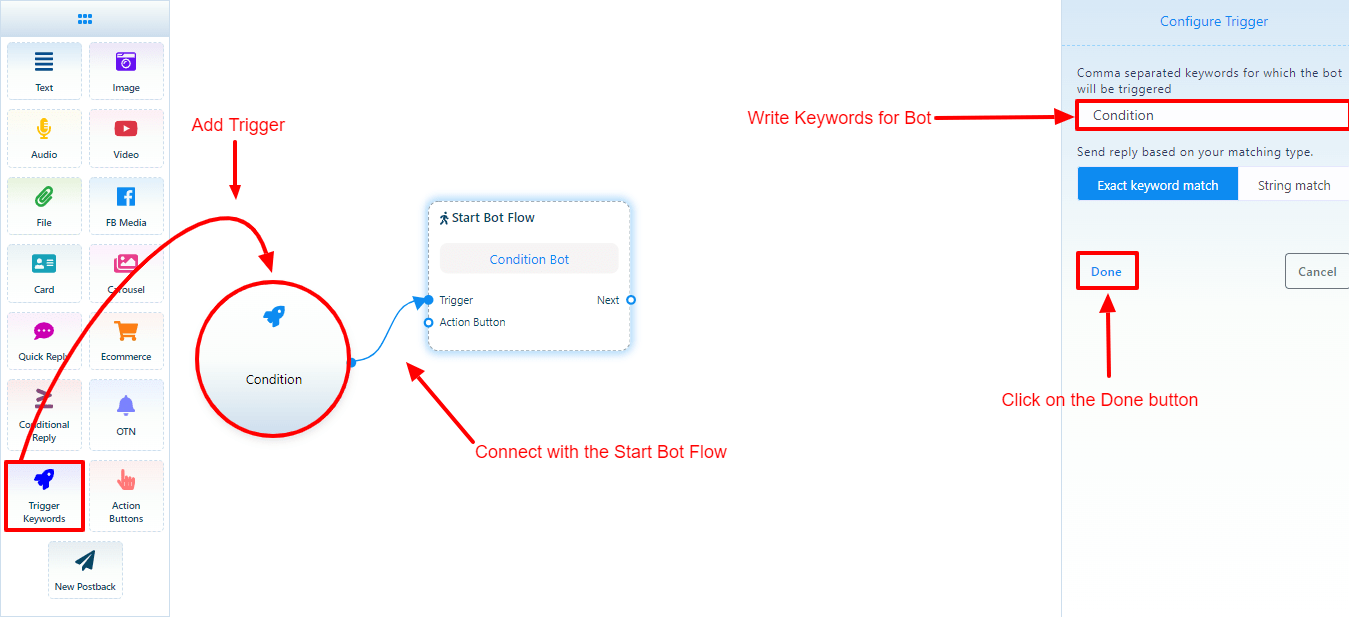
1. Add The Trigger Element | Conditional Reply #
First, go to the editor of the visual flow builder. Now add the trigger element to the editor. After that, double-click on the trigger element to add data. Instantly, a form field will appear on the left side of the editor. Now enter “condition” as the keyword for the bot we are going to build. Now click on the OK button. If a user writes “condition” in the messenger, the bot will start.
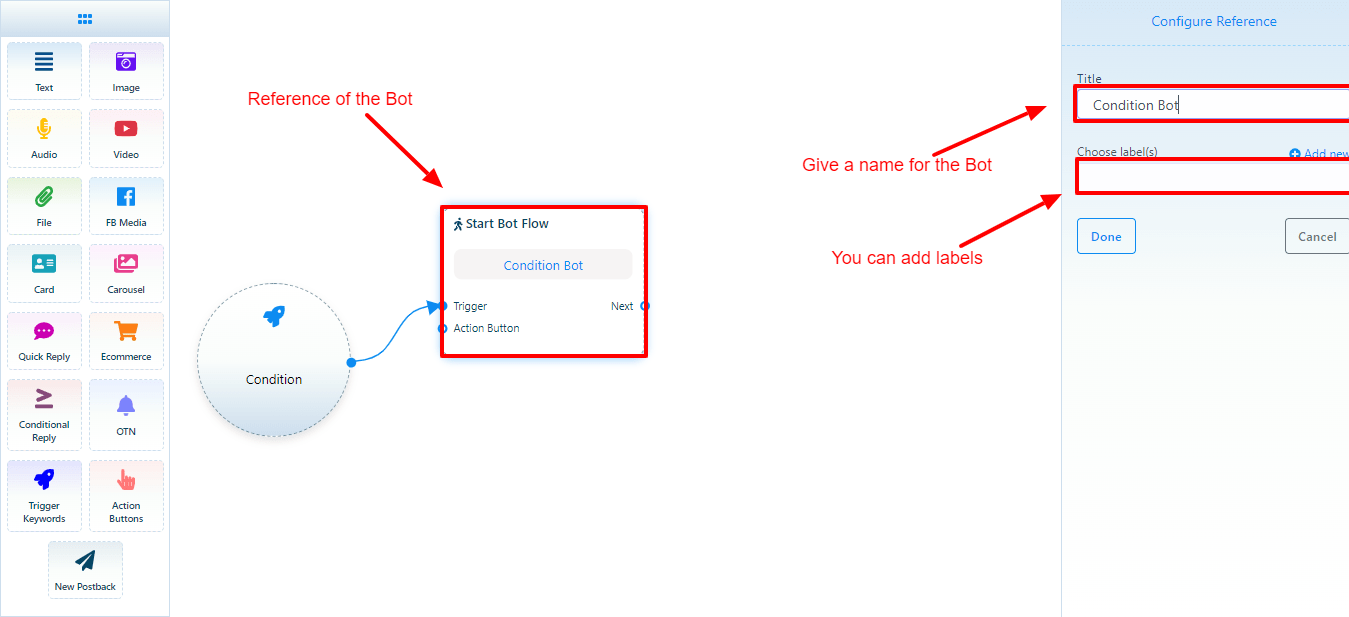
2. Start Bot Flow | Conditional Reply #
Now connect the trigger element to the Start Bot Flow. Now double-click on the Start Bot Flow and a form field will appear on the left side of the editor. Give a title to the bot in the title field. For example, I write ‘condition demo’ in the title field. Other fields are optional. You can keep them blank. Click on the OK button.
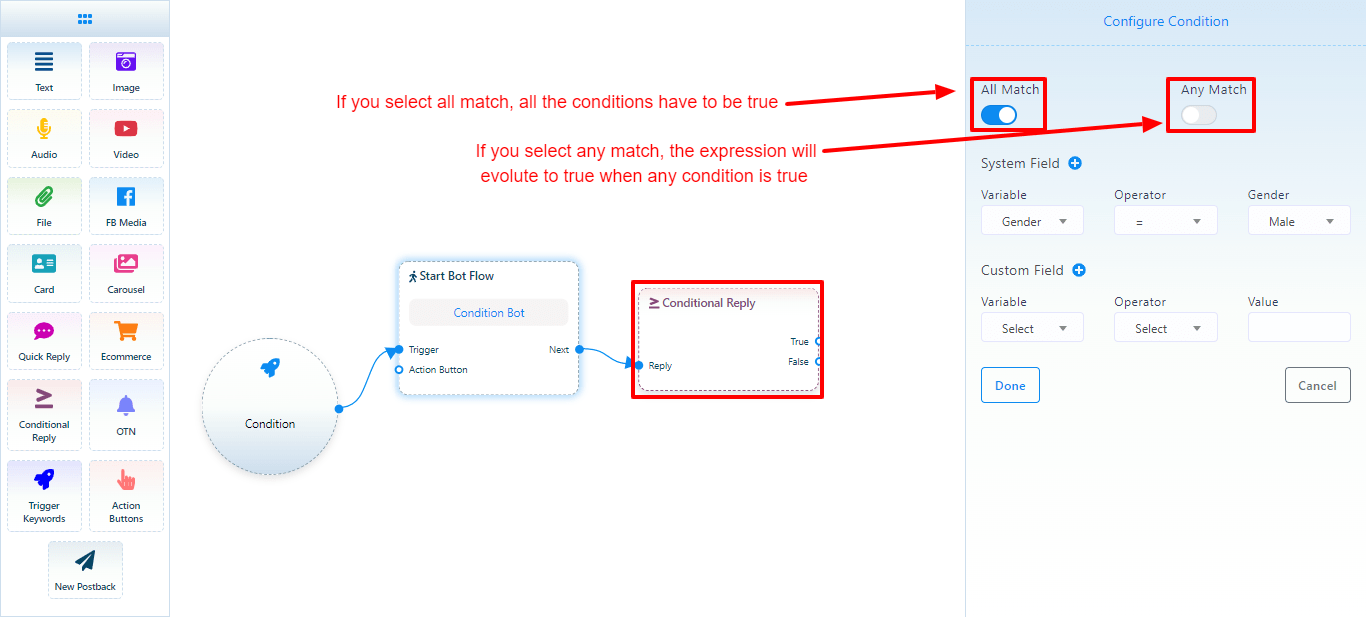
3. Start Bot Flow | Conditional Reply #
Then add the condition element by dragging and dropping it and connecting it with the Start Bot Flow. Now double-click on the condition element. Instantly, a form field will appear on the left side of the editor. At the top of the form field, you will see two radio buttons—All Match and Any Match. And you have to select “All Matches” or “Any Match.” Note that if you select All Match, all the conditions have to be true to evaluate the expression. On the other hand, if you select “Any Match,” at least one condition has to be true to evaluate the expression.
Since we will configure only one condition, you can select any of them.
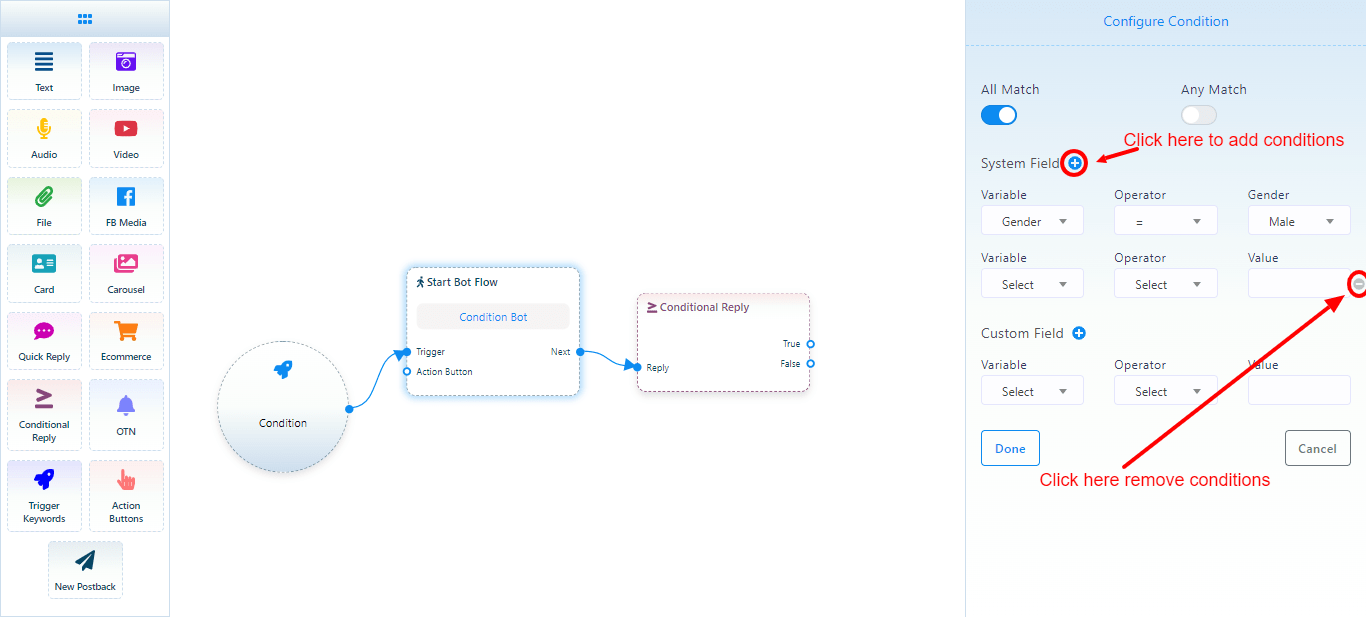
4. System field and the custom field | Conditional Reply #
Then you will see the system field and the custom field. Both the system field and the custom field contain initial fields to configure conditions. Of course, by clicking on the plus sign next to the system field and custom field, you can add more fields to configure conditions on them. Of course, you can remove the extra condition by clicking the remove button.
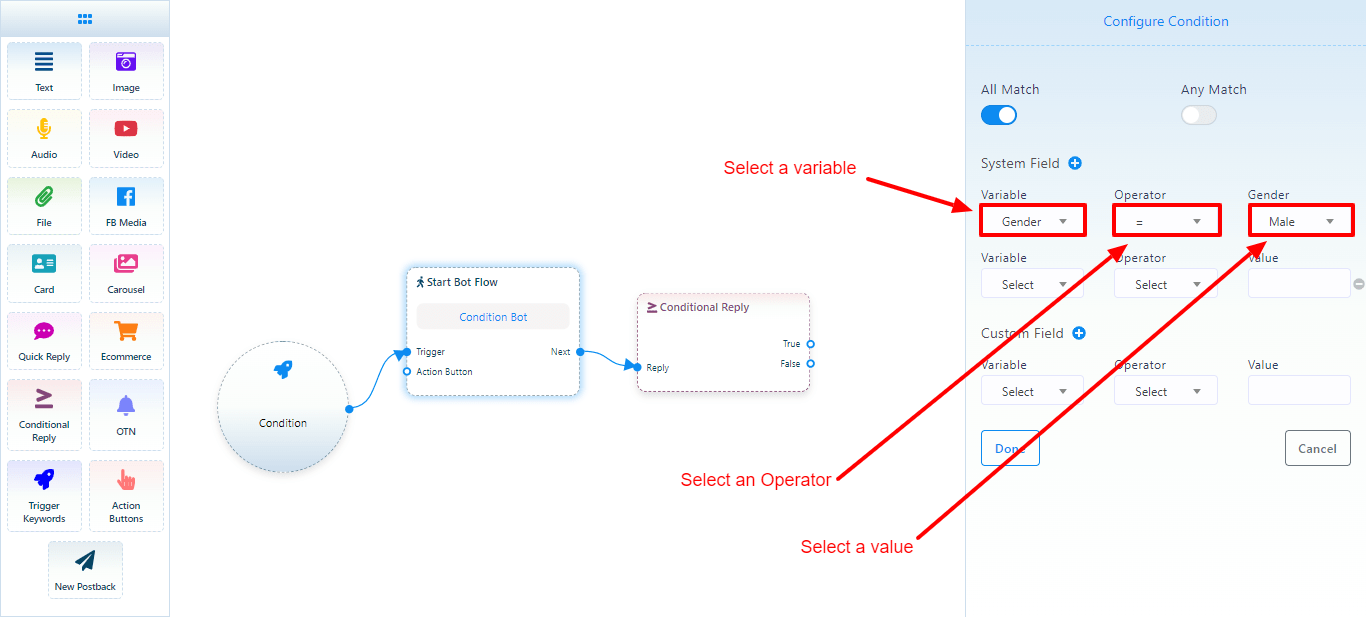
Let’s set a condition to check if the user is male or female and send messages accordingly:
Click on the variable field and a drop-down menu of the different variables will appear. Now you have to select a variable. Likewise, you have to select an operator from the operator field and a value from the value field.
Gender is the variable I choose, Equal (=) is the operator, and Male is the value.Now I click on the OK button to insert data into the condition element.
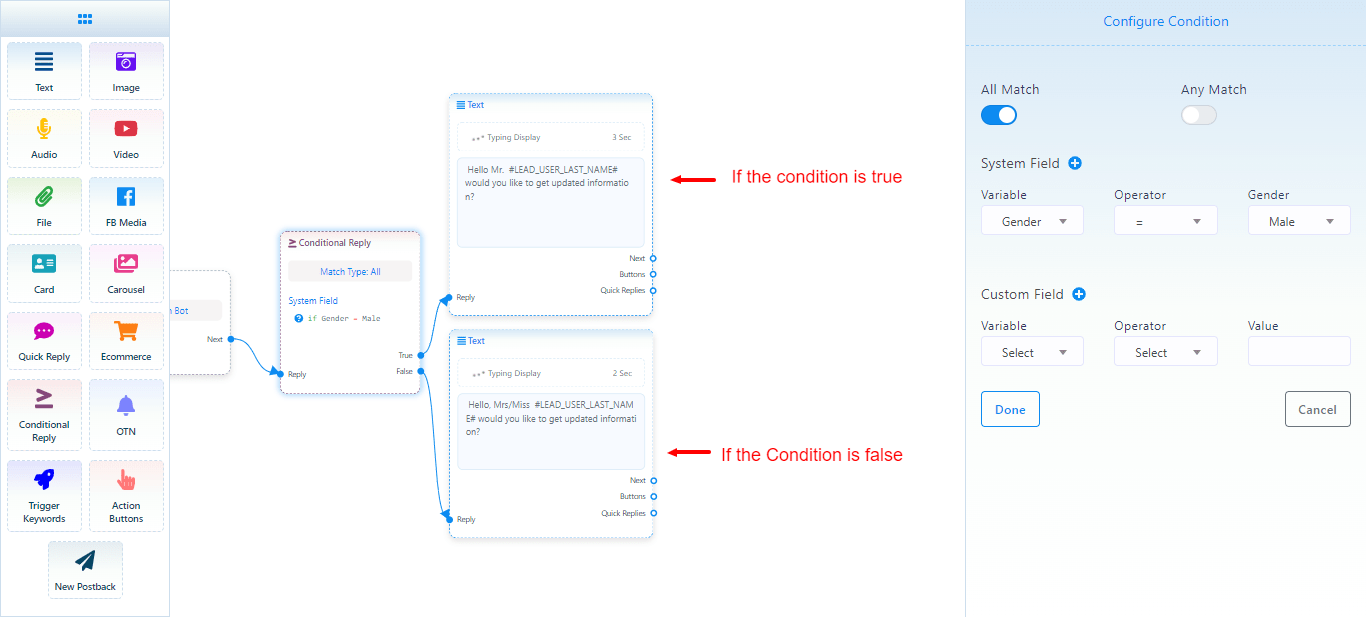
On the condition element, you will see two sockets – True and False. If the condition evaluates to true, the message connecting to the true socket will be sent. In contrast, if the condition evaluates to false, the message connecting to the false socket will be sent.
Well, now add a text element and connect it to the socket called “True.” Then write a message addressing the user as “Mr.” the message that will be sent to the male users.
Likewise, add another text element and connect it to the false socket and write a message, addressing the user as Miss or Mrs, the message that will be sent to the female users.
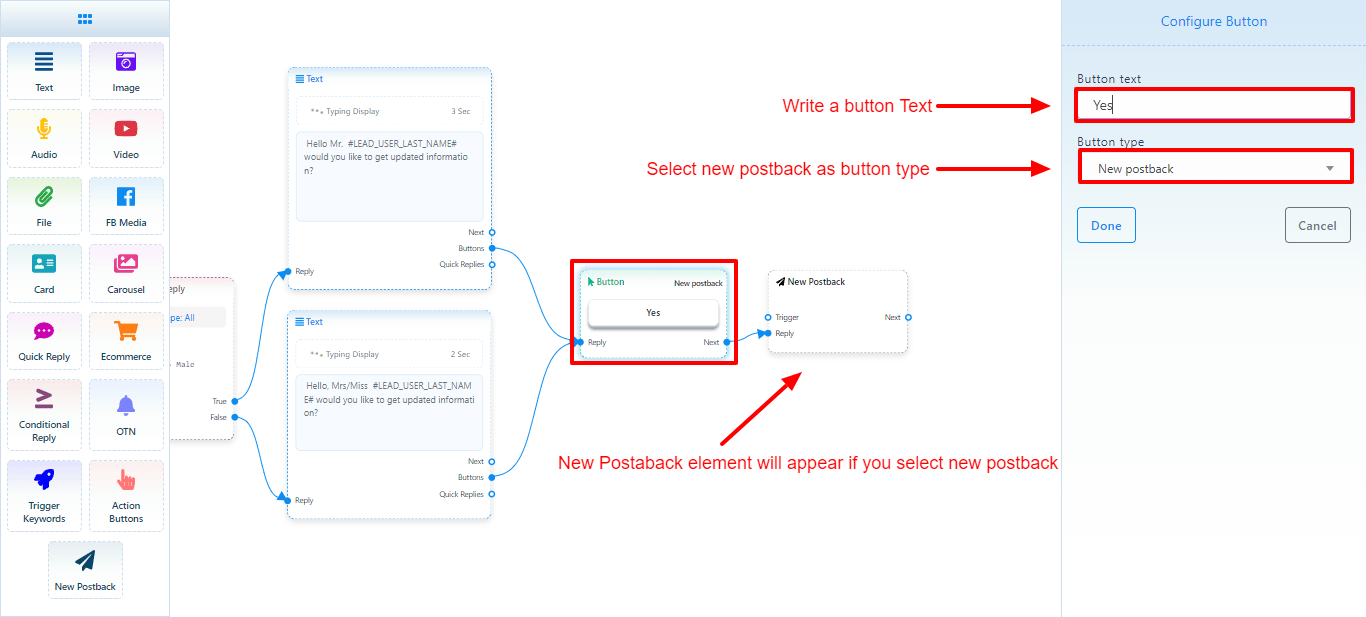
Now add a button element and connect it to both text elements. Well, write a button text and select “new postback” as the button type and click the “ok” button. Instantly, a new postback element connected to the button element will appear. Now give a title for the new post.
Now I will set another condition to see whether the system has the email address of the user or not. If the system has the email address of a user, the bot will inform the user that the updated information will be sent to the email address. On the other hand, if the system doesn’t have the email address of a specific user, the bot will ask for the email address from the user.
Let’s set a condition to check if the system has the email address of a specific user or not and send messages accordingly:
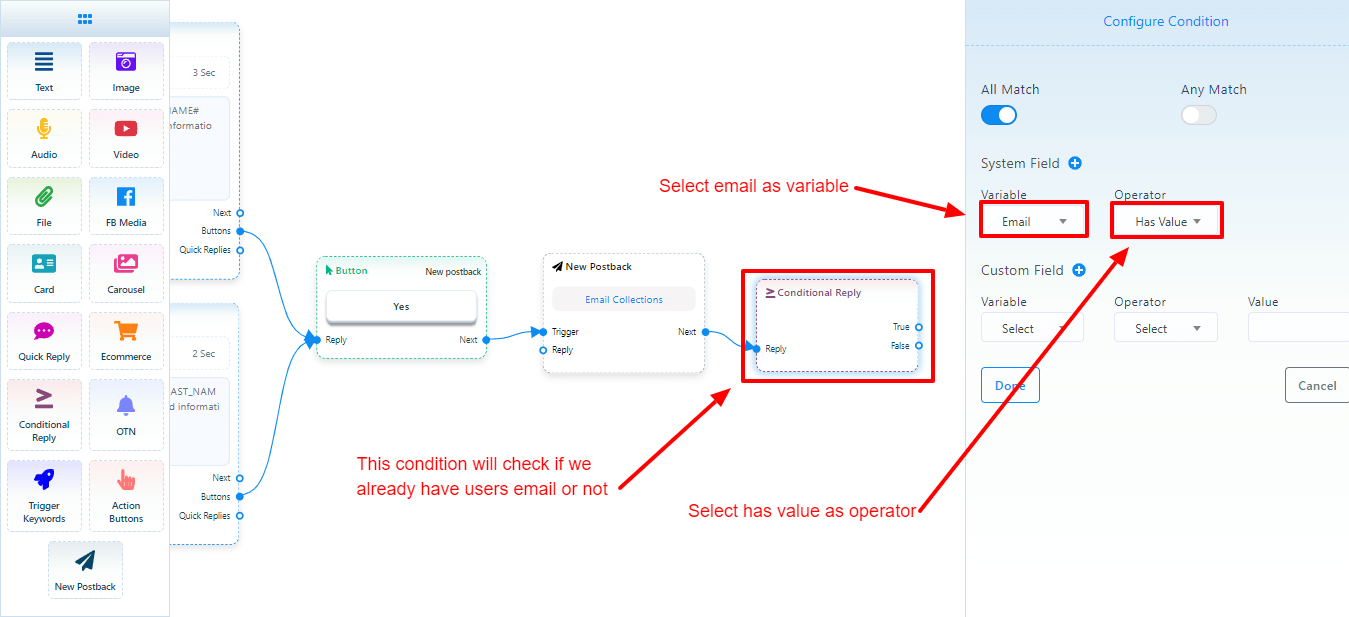
Add a condition element and connect it to the new postback element. After that, click on the condition element to configure a condition. If you configure one condition, it doesn’t matter whether you select All Match or Any Match.
Like before, select Email as the variable and Has Value as the operator. And click on the OK button. That’s all. The condition is met.
Now add two text elements and connect them to the true and false sockets of the condition element. Now click on the text element connected to the true element and write a text message to inform the user that the updated information will be emailed to them.
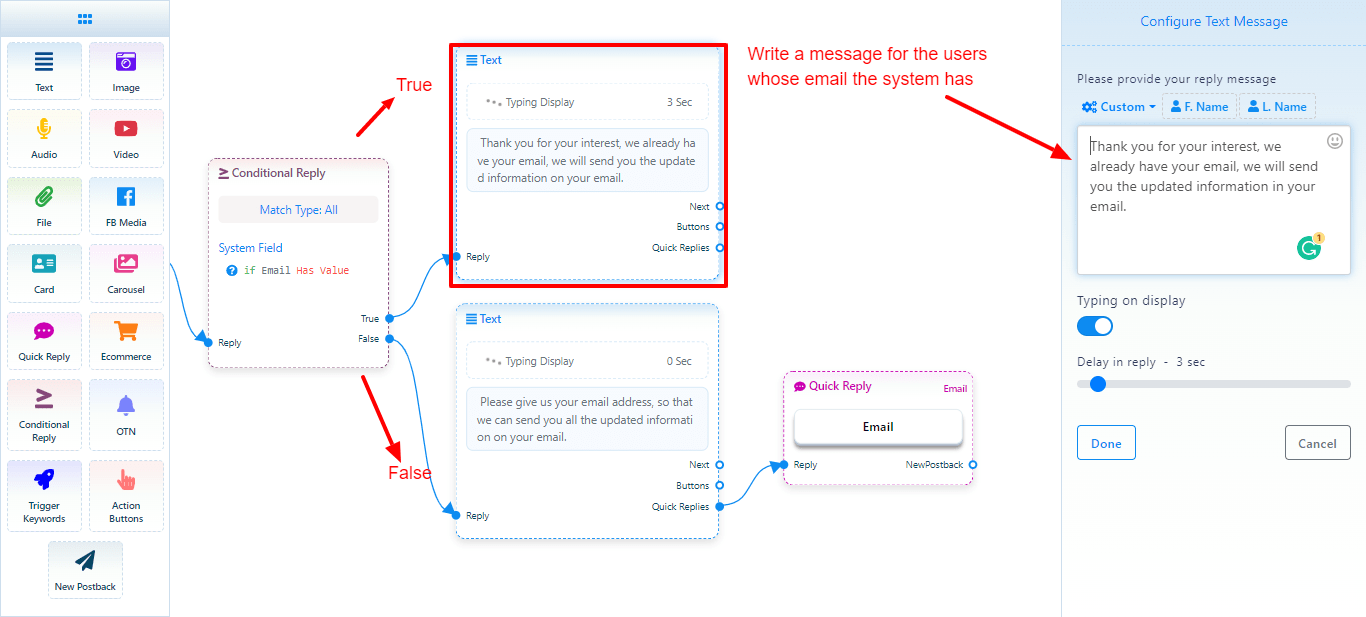
Then click on the other text element connecting to the false socket and write a message to inform the user that the system doesn’t have the email address and tell the user to click on a quick reply button to send the email address.
If the condition becomes true, the text message will be sent by connecting to the true socket. On the other hand, if the condition becomes false, the text message connected to the false socket will be sent. That is, if the system has the email address of a specific user, the bot will inform the user that the updated information will be sent. And if the system doesn’t have the email address of a user, the bot will ask for the user’s email address.
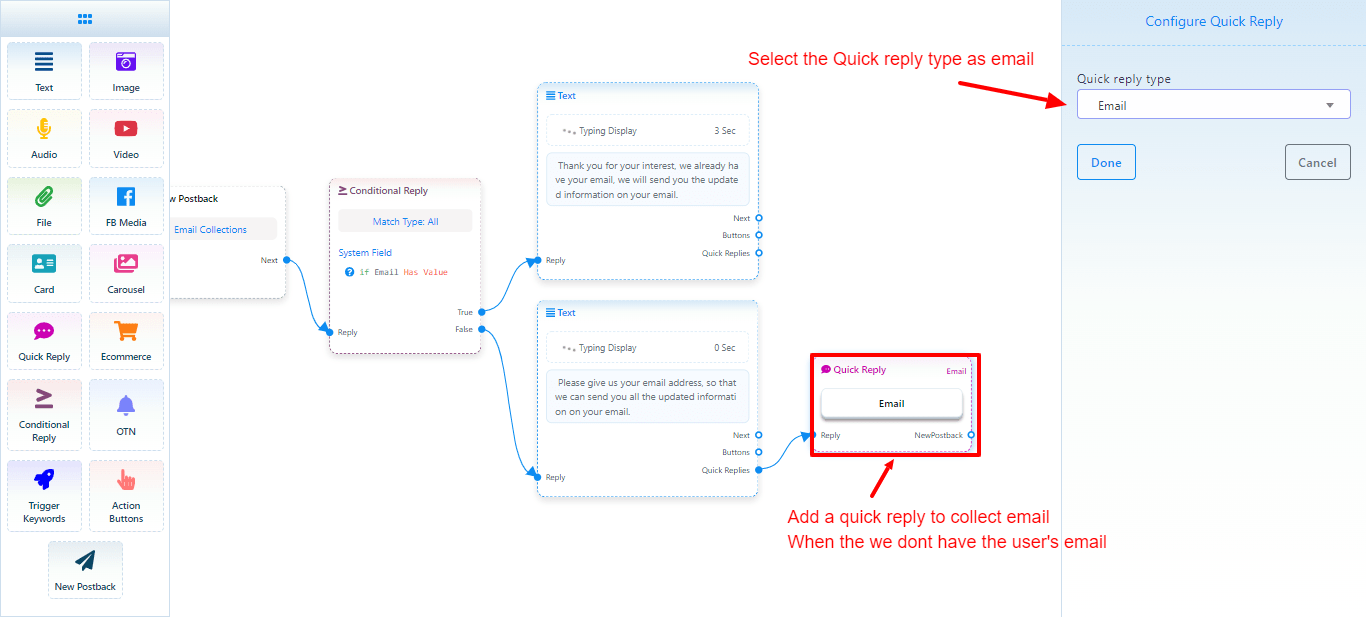
Now add a quick reply button and connect it to the text element connecting to the false socket. Double-click on the quick reply element, select email as the quick reply type, and click on the OK button. With the reply button, the bot will collect the email address from the user.
Now click on the save button or press Ctrl + s on the keyboard to save your bot.
If everything is OK, the bot will work accordingly. That is, if the user is male, the bot will address him as “Mr.” and if the user is female, the bot will address her as “Mrs.” Moreover, if the system has the email address of a user, the bot will inform the user that updated information will be emailed to the user, and if the system doesn’t have the email address of a specific user, the bot will ask for the email address of the user.
Now let’s see how the bot does work:
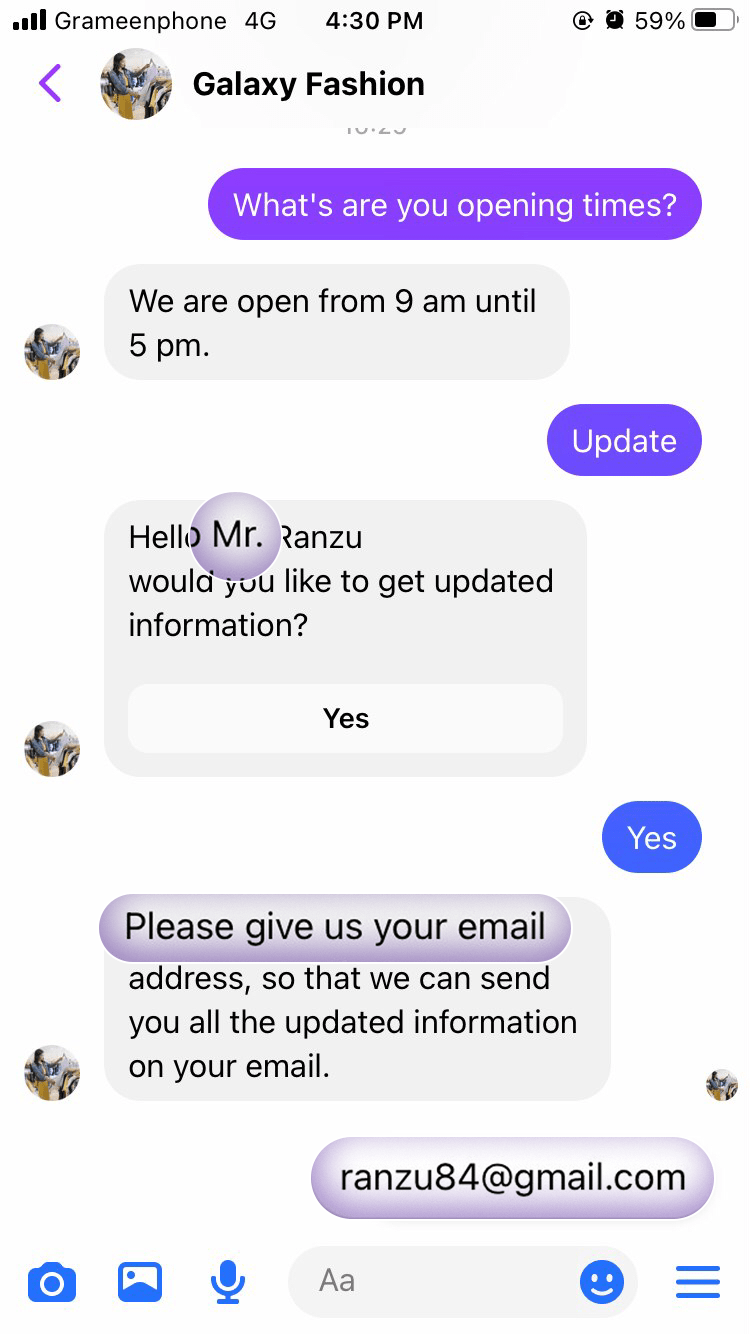
I record the terms in the messenger. The message matches the keyword of the condition-based bot we have made and the first condition of the bot’s start. The condition checks if I am male or female. It finds out that I am male and sends me a text message that addresses me as Mr. After that, I click on the yes button, and the second condition starts. It checks if the system has my email address and finds out that the system doesn’t have my email address. So it asks me for my email address.